


5 Cabinet Painting Hacks
Paint cabinets in a day and a half!
Cabinet painting can come with its fair share of challenges, and without a well-defined process, things can quickly go awry. However, if you can establish an efficient system for painting cabinets quickly, you'll discover the immense profit potential they hold. Painting cabinets can be just as lucrative as painting an entire exterior, thanks to the favorable cabinet painting cost. What's more, it requires comparatively less time investment. With our developed system, we typically complete cabinet paint projects in about a day and a half. These projects have become a favorite of ours due to the substantial profit they offer when executed with precision. So, without further ado, here are five simple and effective cabinet painting tips to optimize your time and effort, and propel your company to new heights.
Get the Paint Life Cabinet Painting Course for $149. View course details HERE.
1. Clean with Dawn Dish Soap and Prep for Cabinet Paint
A crucial aspect of cabinet painting, much like any other job, is thorough preparation. Accumulated residue on cabinets can hinder the proper adhesion of the lacquer, leading to various issues. That's why we prioritize a meticulous cleaning process using a residue-free cleaner. Our go-to choice is regular blue Dawn dish soap, paired with a Uneeda Non-Woven pad and warm water. In case you require faster drying, denatured alcohol can serve as an alternative. However, we find that Dawn dish soap effectively eliminates most contaminants in approximately 95% of cases.

To begin, fill either a Wooster 24” roller bucket with warm water and Dawn dish soap, as if you were preparing to wash a load of dishes. If you're unfamiliar with dishwashing, this could be a good time to learn—a skill that will likely be appreciated by someone in your life. When washing the cabinet doors, avoid submerging them in the water, as this would prolong the drying time and potentially damage the wood. Instead, place the doors on top of the bucket and thoroughly scrub them with the sponge. The bucket will catch any excess water runoff. Rinse the doors over a separate bucket of clean warm water without soap.
Once cleaned, allow the cabinet doors and drawer fronts to dry. You can either hang them (using our recommended PSDR System method if you're familiar with it) or position them to facilitate airflow on both sides. Using the PSDR system offers several benefits, including faster drying throughout the cabinet painting process. Additionally, the doors and drawers will be stored in a safe location, protecting them from accidental knocks or recontamination with residue.
2. Caulk with Tower Accelerator for Same Day Painting
Living in Idaho, we're no strangers to dry and dusty weather. It's like a desert out here! While the climate varies across the state, most parts, including where we're based, stay pretty parched throughout the year. Lucky for us, this means we can get away with caulkin' the front panel of our cabinets without worrying 'bout cracks down the road. Now, if you're in a more humid area, I'd reckon you might wanna skip this technique. Remember, climate plays a big role in finding the right methods for your DIY cabinet painting.
Here at The Idaho Painter, we're big fans of this method 'cause it gives us a smooth-as-silk finish. But let me tell you, if you don't have the right products, it can eat up a lot of your time. Most caulking needs a solid 12 hours to cure before you can paint over it. That kind of puts a dent in our "get it done in a day and a half" pride... and in our pockets too. 'Cause time is money, my friend! So, to speed things up, we've discovered Tower Accelerator Caulking. This caulking is paintable immediately! How incredible is that?
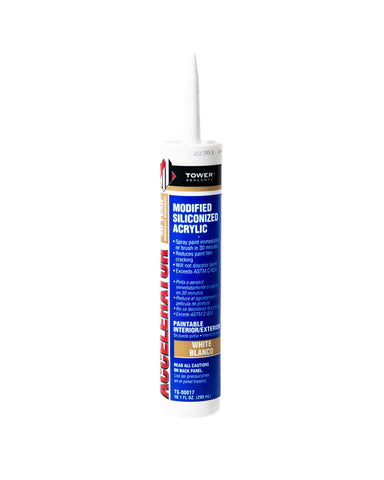
Remember in this industry, time is precious, and the faster you can wrap up a job, the more money you'll bring home. So, give this Tower Accelerator Caulking a whirl, and trust me, it won't let you down. It's all 'bout efficiency when it comes to rockin' your cabinet painting game.
3. Achieve Flawless Results with the PSDR Spray Rack
For efficient professional cabinet painting, we've perfected a method that delivers exceptional results in record time. Our preferred tool/cabinet painting kit includes the PSDR Rack by Paint Line, a spray rack system that allows you to vertically spray cabinet doors and let them dry while suspended from hangers. With this approach, you can spray both sides simultaneously and apply multiple coats in a single day. No more waiting for doors to cure before flipping them over. To enhance durability, we use 2K poly like Renner 851, which accelerates drying and creates a long-lasting surface for resilient cabinet repaints. This winning combination enables us to complete large kitchen projects in just about a day and a half, saving time and boosting profits.

The PSDR kit includes 50 hangers, 18 feet of durable drying line (3 drying racks), a spray rack that allows you to spin doors while spraying, and three storage cases. This system is easy to set up and only takes about 10 minutes to assemble. Check out the PSDR system in our Paint Life Store and kickstart your cabinet paint journey.
To hang doors on hangers, we simply screw small cup hooks into the tops and bottoms of the upper and lower cabinets, respectively. These discreet holes go unnoticed, but you can always fill them later if desired. We explain this process to clients, and the inconspicuous holes haven't raised any concerns. Your customers won't be scrutinizing cabinets from above or below in their day-to-day activities.

Did you know that you can get your paint loaded in aerosol cans for effortless touch-ups? That's right! When purchasing, you have the option to request an aerosol made of whatever color of paint you will be using. While it may cost you around $8-$12 per can, the convenience it offers is well worth the additional fee. Typically, we obtain two to three cans per job to ensure we have an ample supply. This eliminates the need to reload a machine just to touch up one or two doors. With these spray cans, you can easily mask off and touch up areas without worrying about brush strokes.
One minor drawback of this method is that you'll need to apply several very light layers to achieve the desired finish. However, it's still more efficient than going through the process of setting everything up again. Plus, it guarantees a flawless finish, free from brush strokes. Why not give it a try and see how much you like it? We find it incredibly useful for our cabinet painting projects.
5. Streamline Re-installation: The Power of Hinge Labeling
Keeping track of doors and drawers during cabinet painting can quickly become a daunting task. Guessing wrong can lead to extra time spent adjusting hinges to ensure a proper fit. To maximize efficiency and profitability in your DIY cabinet painting projects, our final tip is a no-brainer: label your doors, boxes, and hinges. The process is straightforward. We always work from the top left to the top right, then the bottom left to the bottom right. We place a number on the back of each door where the hinge will be screwed back on, covering it with a piece of Frog Tape to prevent it from being painted over. Additionally, we tape the insides of the box with the corresponding door number to ensure the right door goes in the right place.

For drawers, we label the number on the face behind where it screws back onto the drawer, again covering it with the Frog Tape to protect it from paint. As for hinges, we write the number of the coordinating door on the back of each hinge, designating "a" for the top hinge and "b" for the bottom. Sometimes, we even wrap them in tape to keep them together and prevent any feelings of exclusion.
This simple labeling system significantly eases the re-installation process. By following this method and putting everything back where it belongs, you'll spend less time adjusting hinges and ensuring a perfect fit. Who knows, this attention to detail might even set you up for success in other areas of your life as well.
Bottom Line
There you have it, 5 simple yet powerful hacks to boost the efficiency of your cabinet painting endeavors. It's no secret that cabinet jobs come with significant earning potential, given the high cabinet painting cost. The key lies in mastering the art of quick and skillful execution. As painters, we should always embrace the opportunity to learn and adapt, leveraging new tools and techniques that emerge daily to enhance our productivity. Working smarter, not harder, is the ultimate goal when time and money are at stake. Keeping an open mind is invaluable for the growth of your painting company, and it extends to all aspects of life.
Remember, there are endless possibilities to elevate your work to the next level. Explore new tools and discover innovative tricks that can revolutionize your painting process. But don't just take my word for it. Take action and showcase your expertise. Hustle your way to making the world a more beautiful place, one paint job at a time.
While you're on your journey to excellence, don't forget to visit the Paint Life Store. We offer a range of apparel, unique gifts for painters, and game-changing tools approved by the Paint Life Crew. Click HERE to explore our store and take your painting endeavors to new heights.
Learn more: How to Paint Cabinets Step by Step!

Get the Paint Life Cabinet Painting Course for $149. View course details HERE.
1 comment
We have watched your utube videos on cabinet painting mostly to get a factory finish and are pretty disappointed at how hard it is to get rid of the grain in our basic oak cabinets. Any suggestions?