


Steps Painting A Garage Door
How to Paint a Garage Door
Painting a garage door can be intimidating. Unless you live in a castle, it’s probably the biggest door in your house - by far. To add to the challenge, you’ve also got weatherstrips and divisions between the door panels that make it a challenge one which direction to spray. Where should you even begin? Worry not, because it’s far from impossible. By breaking the process down into smaller, easier steps, you’ll have a fresh new look on your garage door in no time.
The first step is to make sure the garage door is clean and free of contaminants. The most efficient (and fun) way to do this with a pressure washer. Along the bottom of the door is an exposed weather strip that rests between the bottom of the door and the concrete. You don’t want any paint to get on this. To mask it off, we used 9” paper with 1” green FrogTape and then tuck it behind the door, tacking it against the back with more FrogTape to hold it up. This process is made much faster by using a hand masker and a tough gaff tape holder, both of which are sold at Paint Life Supply Co.
Next is to mask the concrete. The important part here is to mask far enough inside the garage that when the door comes down, it sits on the paper and creates a seal to protect inside the garage. You also want to tack the paper down well to ensure it doesn’t kick up on the freshly painted door. If the trim along the edges of the door is high enough off the ground, you’ll want to get that paper tucked underneath it for the best coverage. We use two rows of our 9” paper across the length of the door for it to sit on. Some people feel nervous that 18” total isn’t enough coverage, but if you’re using a proper tip and your sprayer is set to the proper pressure it should be plenty of overspray coverage. Whatever your comfort level, throwing a drop cloth down should alleviate any fears.
Once the concrete is all masked off, it’s time to close the garage door. If the masking paper interferes with the garage door sensor, you may need to hold the button down or shut it manually. A common concern at this stage is whether or not vehicles inside the garage are at risk of being hit with overspray due to the separate door panels. Thankfully, modern garage doors are insulated with weather strips and also form a J-figure when shut, preventing anything unwanted from passing through. The gaps behind the weather strips along the side and top can also be ignored. Painting these can cause them to tack against the door in the heat, resulting in damage when the door is opened.
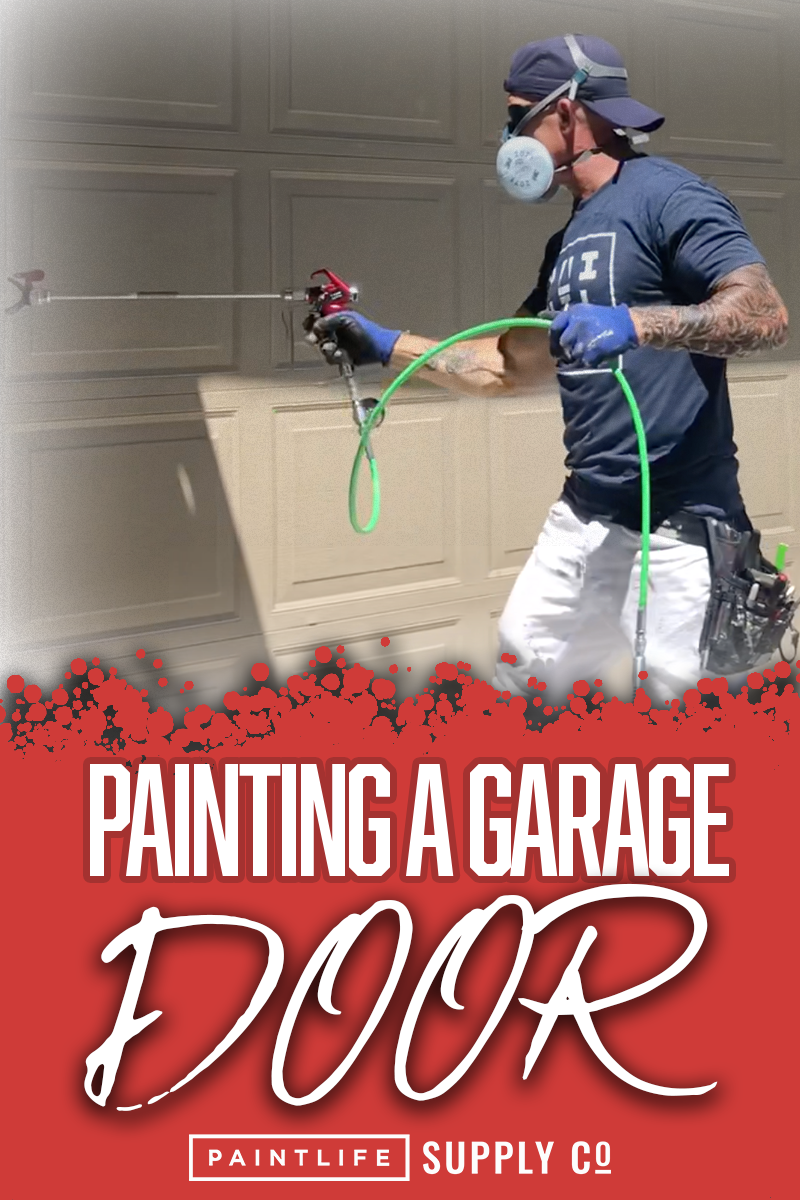
The best way to spray is in an up and down motion, working left to right so that you’re only walking the length of the door once. Using a 18” gun extension will eliminate any need to reach or bend over. Overlap 50% as you spray to ensure you have good coverage and keep a wet edge. If your pressure drops mid-spray from using small airless pumps, you spray pattern will begin to tail. Release the trigger occasionally to let the sprayer keep up with you.
Once you’ve finished spraying your garage door, you want to raise the door about halfway before the paint has time to dry. If you don’t, it can become glued to the weather strips we were talking about earlier. If this does happen, all you need to do is take a knife along those edges and score through them to get rid of any paint bridging before opening the door. Raising the door while it’s still wet is preferable because it also keeps the wind from blowing any debris onto the wet paint. Now you can take the masking off the bottom of the door, but you’ll still be painting the trim by hand later so don’t pull it off the concrete just yet.
Sponsored by FrogTape